5 Easy Steps To 3D Printer Bed Levelling
Bed levelling is a key aspect of making sure that you have a successful print. It's one of the first things that you should do when you buy a 3D printer and definitely one of the first things you should look at if you are having trouble with your prints. A lot of the high-end 3D printers feature automatic bed levelling, however, the cheaper/older 3D printers may not feature it.
There will be a lot of different times where re-levelling the print bed is needed throughout the course of your 3D printers usage, so don't feel like you're having to re-adjust the bed levelling too many times.

Symptoms of Bad Bed Levelling
Plastic builds up around the head after printing
If the space between the bed and nozzle is too small, you will find that you will get filament building up around the surface of the nozzle. This can end up causing the entire print to come off the bed later on in the printing process, it could completely misalign the print. One of the main causes of this issue is having an unlevel bed, bed levelling should fix this issue.
The print doesn't stick to the bed
One of the most important factors of having a really good print is having a great first layer. To get this desired first layer, you will definitely need good bed adhesion. One of the main factors of not getting a good bed adhesion is having too big of a gap between the nozzle and the bed. It causes the first layer to not stick properly to the bed and start to peel off. If the bed is not level but it does stick, you will definitely run into issues later in the printing process.
Gaps on your print are too thin
Problems with your first layer, including uneven extrusion, can be caused by a variety of different faults, one being an uneven bed. The 3D printer filament is extruded at an even rate due to the pressure pushing it forward. If the gap between the bed and the nozzle vary in different places, the filament pressure has to change to fill that extra bit of space/keep it level with the rest. The changing of the pressure can result in many issues including extruder jams, gaps in your layers and inconsistency.

How To Level The Bed
If this is the first time that you are conducting bed levelling, the main purpose of this is to make the nozzle an equal distance from the bed at all points. Doing this will make sure that the print comes out evenly without any inconsistencies. Please note that different printers will be built a little different from others, the technique is the same but some instructions may vary.
- Find a piece of card/paper that has the same thickness as a standard 8.5 x 11 piece of paper.
- Adjust the knobs or bolts that control the movement of the glass/metal plate so that they are tight
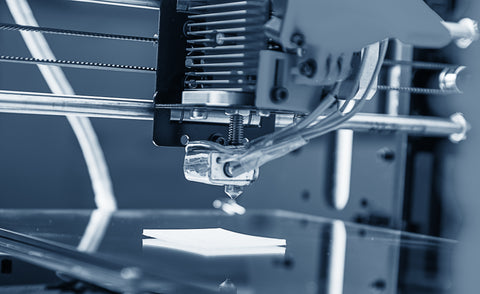
- Move the print head to the centre of the plate and then place your card/paper underneath the nozzle. Adjust the Z-axis until there is a little resistance when you try to move the card/paper from underneath the nozzle. The trick is to have the card or paper have a slight resistance, if the card moves easily, the nozzle is too far away. If the card is not moving, adjust the build plate lower as the nozzle is too close.
- Repeat the process on all of the corners of your plate, make sure that all corners are properly adjusted to give the card a slight resistance.
- Keep repeating the process until all of the corners and the middle match the criteria for a level bed, this can take a couple of tries to get it right, this is due to adjustments affecting each corner. The adjustments will get smaller as it goes on though.
Now that you know how to conduct bed levelling and how to spot the symptoms of an uneven bed, you should be able to start printing with confidence on your optimised 3D printer. If you have a metal bed on your printer, make sure to heat it up a little bit, this is due to the metal expanding a little when it gets warm, which may occur when printing.

You can also buy these accessories to help you with bed levelling for Creality3D printers:
The Creality3D - Upgraded big hand twist levelling nut is a great accessory for Creality3D printers. They help with adjustments and keeping the bed steady.
The Creality3D Auto Bed Leveling Kit is another great accessory for Creality3D printers. it’s a great auto bed levelling kit that is easy to set up and use.


Leave a comment